Setting Up Email and Email Scenarios in Business Central
Setting up email in Microsoft Dynamics 365 Business Central allows you to send invoices, sales orders, purchase documents, notifications, vendor remittance, and other communications directly from Business Central. However, configuring the email account is only part of the overall process. Email scenarios are crucial as they determine which email account is used for different types of messages, making it essential to configure both aspects correctly to avoid any potential issues. In this comprehensive guide, I’ll carefully walk you through the steps to set up email in Business Central and configure email scenarios effectively, ensuring that your emails are sent from the appropriate account without any hitches.
Setting Up an Email Account
- Search for Email Accounts in the global search and go to that page.
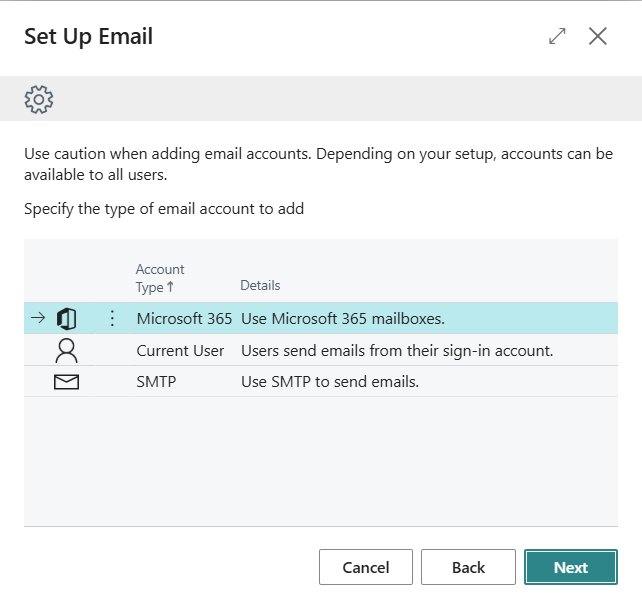
- Select +Add an email account under the New tab. This will open a wizard that walks you through the setup for a new email.
- There are three account types available:
- Microsoft 365 = Use a shared Microsoft 365 mailbox for multiple users in your organization, like accounting@example.com. Make sure Business Central users have access to the email, or it will error when trying to send.
- Current User = Users will send emails from their Business Central sign-in account.
- SMTP = An email connection option that lets you send emails through a specific mail server instead of using the standard Exchange Online integration. Typically used when you are sending from a third-party email provider or a custom mail server.
- On the final page, toggle Set as default to make this email the default for all communications in Business Central. You can still set up specific documents to send from different emails as described later in this article via Email Scenarios.
- Rate Limit Per Minute: The default and recommended number is 30 which aligns with Microsoft 365 sending limits. A value of zero would mean no limit but it’s best to match your email providers allowed sending rate.
- Clicking the Set email rate limit button in the ribbon under the Home tab allows you to modify the rate later. You also have two additional options: Concurrency Limit for the number of emails sent at once, and Max. Attempt Limit for how many times Business Central will retry before giving up on a failed email.
- Finally, ensure that you send a Test Email to ensure your settings are all correct.
Important Note: When using a Sandbox for testing or implementation purposes, be careful not to send emails to customers or vendors. It’s best not to create email accounts; if you must test, use your own email in the customer/vendor record to prevent sending fake emails. If you copy your Production environment to make a new Sandbox, Microsoft will automatically remove your email account settings to prevent accidental communications.
How to Assign Email Scenarios
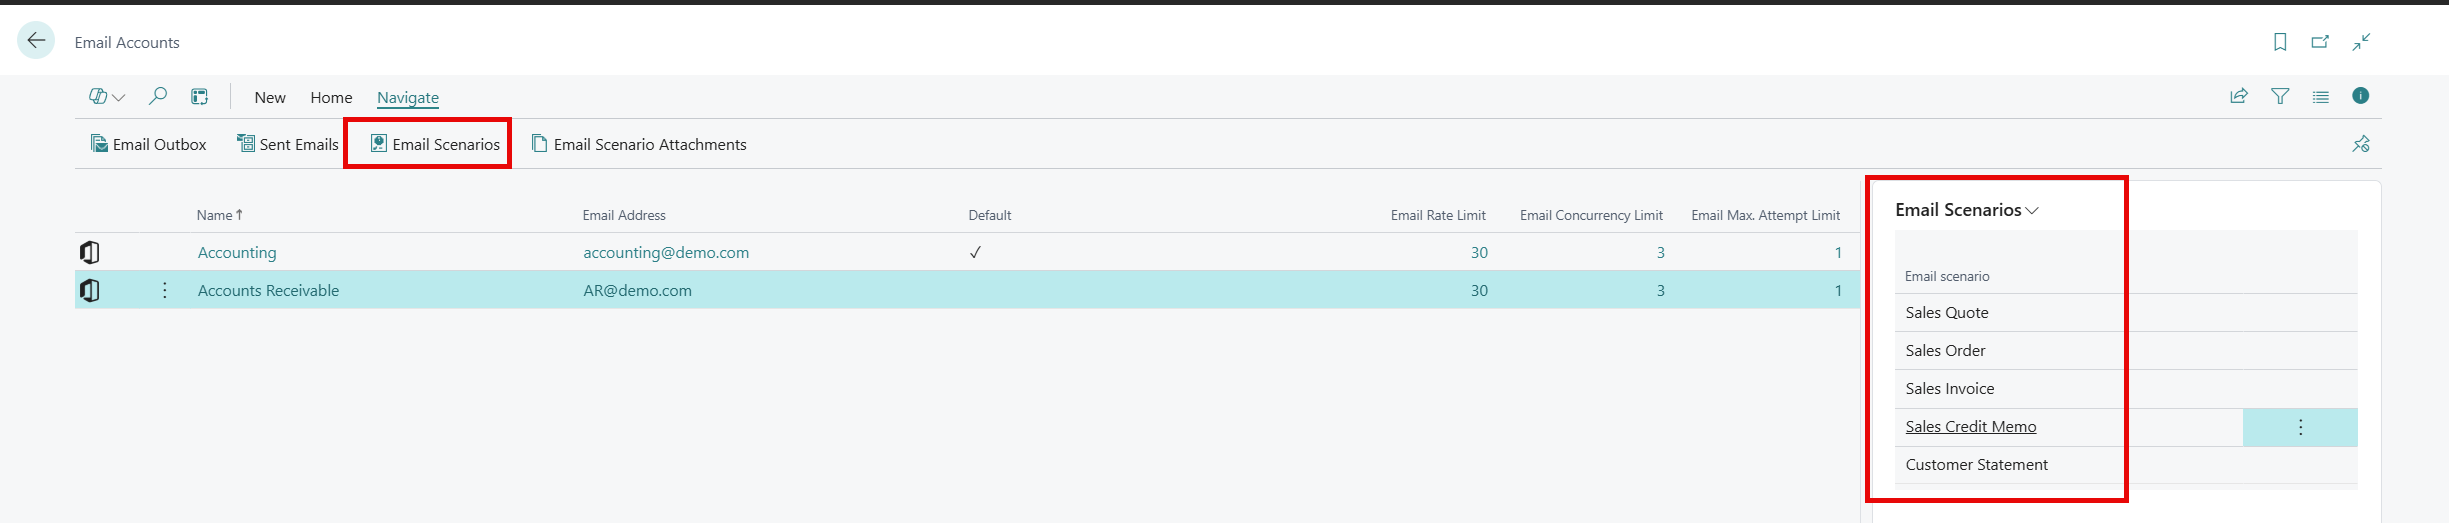
Email Scenarios determine which email account Business Central uses for different types of emails, providing flexibility in communication. For example, a scenario set for Accounts Receivable can use a specific account for all sales and customer-related communications, ensuring that emails are sent from a consistent source that aligns with the company’s branding. This not only makes the emails look more professional but also directs replies to the right team. If a scenario is set up, it takes priority over the Default setting for an email account, allowing for better management of communications.
From the Email Accounts page, under the Navigate tab, select Email Scenarios to add assignments. In the example below, I’ve set up all sales and customer related emails to come from the Accounts Receivable email overriding the default. Each scenario can only go to one email, so you won’t accidentally add it to more than one. Another common use case would be to setup a generic Accounts Payable email for all purchase and vendor related communications.
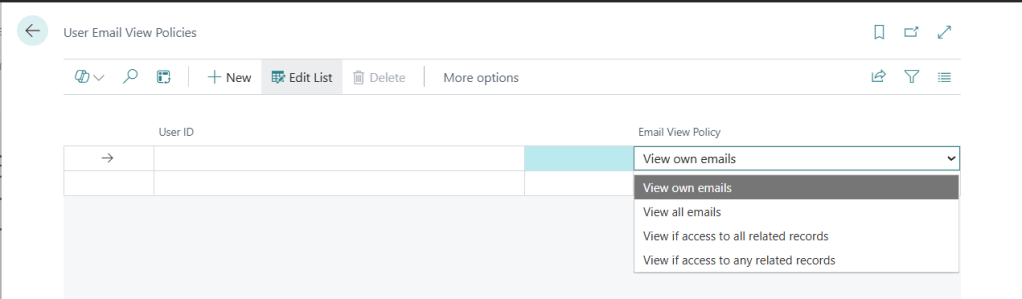
NOTE: All emails from Business Central are recorded on a Sent Emails page, which you can access by searching through the global search or via the Email Accounts page. Emails are also saved in the outbox outside of Business Central. Additionally, there is an Email Outbox in Business Central where draft or failed emails can be found. Worried about what emails users can view? Checkout this guide on how to limit what users can see through User Email Policies
Thank you for reading, I hope you learned something new.
As always, stay SAASY my friend.
-Dino


Leave a Reply