Positive Pay is a useful tool for preventing check fraud. It allows banks to verify checks presented for payment against a list of authorized checks from the account holder, including electronic payments (ACH). In the age of AI, where creating fake checks is easier, Positive Pay ensures only real transactions are processed, helping to prevent both AI-generated fakes and traditional counterfeits. This approach protects businesses’ finances and boosts confidence in banking. For users of Business Central, obtaining the necessary file for Positive Pay is simple, enhancing financial management.
Positive Pay Workflow in Business Central
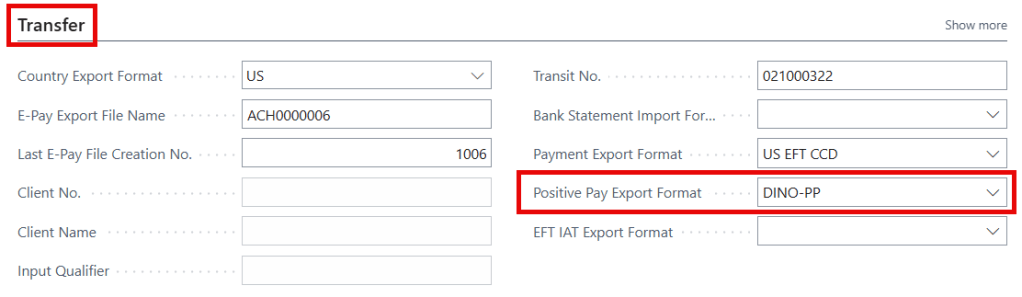
Firstly, this article assumes you’ve set up the positive pay file based on your bank’s requirements. If you haven’t, please refer to this article for a complete setup guide: How to Set Up Positive Pay Files in Business Central (Step-by-Step)
- Create Payments: Use the Payment Journal to create payments. In this journal, you have the ability to print checks directly from Business Central, record manual checks written outside the ERP, or generate an ACH file for your bank. When processing payments, new entries are added to a Check Ledger Entry table, which is utilized in the Positive Pay file.
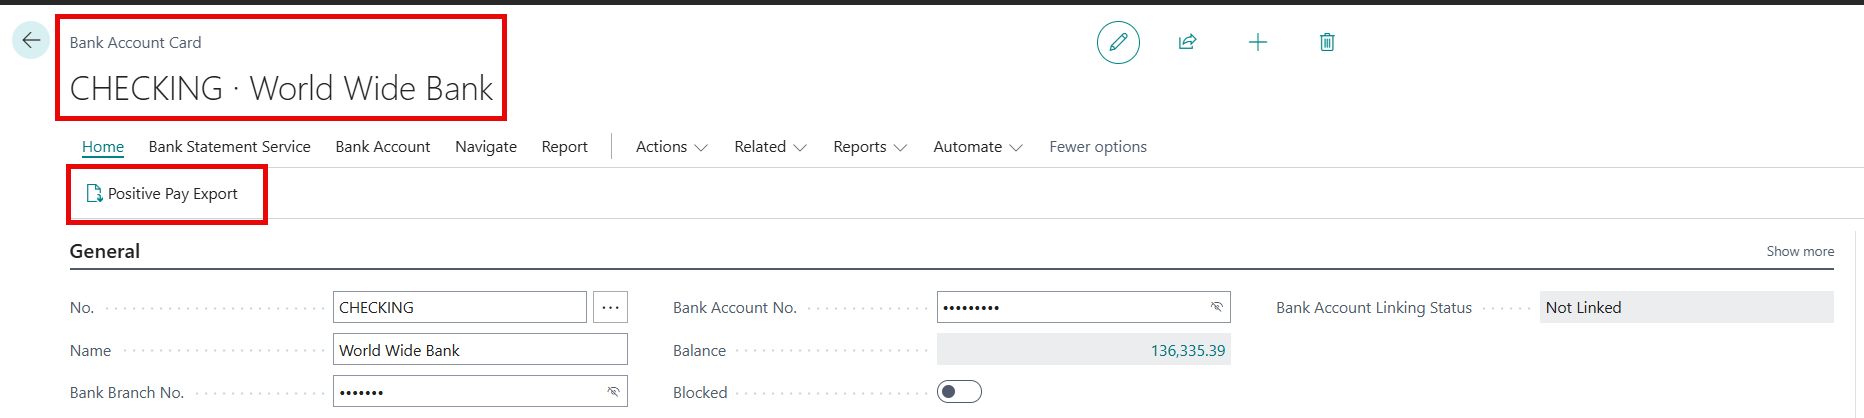
- Exporting Positive Pay File: After creating payments, go to the Bank Account Card and click the Positive Pay Export button to generate a text file that you’ll save locally.
- Upload to Banks Portal: Login to your banks web portal and upload the file to their Positive Pay import. You’ll need to contact your bank for specific instructions on this.
- Confirmation Number (Optional Step): You can add a Confirmation Number from your bank to the exported record for informational purposes.
Exporting Positive Pay: End to End
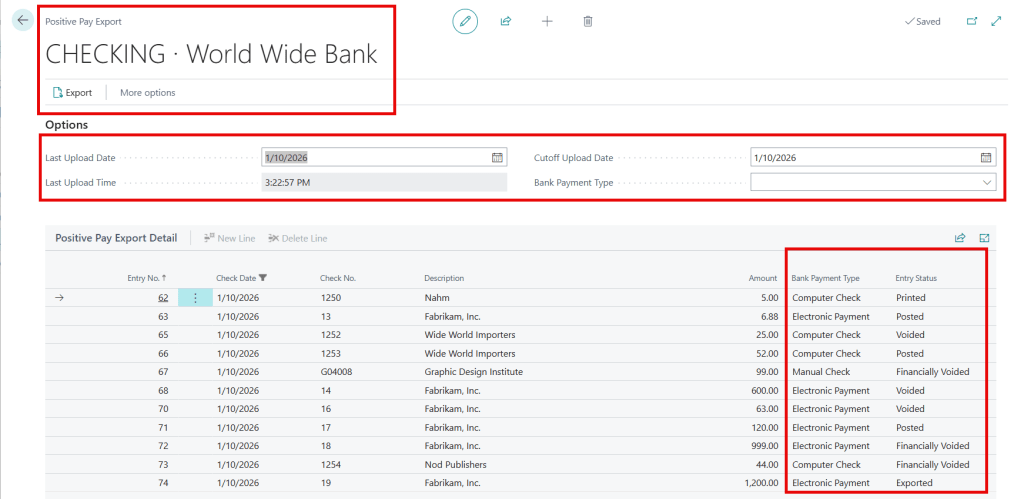
The Positive Pay Export page displays a list of payments to export based on your filters. This list comes directly from the Check Ledger Entries table. Below are explanations of the filters you can use to narrow your results.
- Last Upload Date and Time: Updates automatically with the last export’s date and time. Entries with a Check Date before this are excluded but it can be adjusted if necessary.
- Cutoff Upload Date: Entries must have a Check Date on or before this date to be included and you can also modify this field.
- Bank Payment Type: Choose a specific payment type to export, including Blank, Computer Check, Manual Check, Electronic Payment, and Electronic Payment-IAT. If you want to export all payment types simply leave the filter blank.

What does the Entry Status mean for the Positive Pay Lines?
- Printed: A computer check is printed in the Payment Journal but not posted. It hasn’t affected the general ledger and needs to be finalized. The only entry created so far is a Check Ledger Entry. You can either post or void the check, but you cannot delete the payment journal line.
- Posted: This means the entry has been posted and it’s hit the appropriate ledgers. It’s a valid payment.
- Voided: This occurs when electronic payments or computer checks are voided in the Payment Journal before posting. Since the entry is not posted, there are no general ledger entries, only a Check Ledger Entry recording the payment. The only change is an update of the status on the Check Ledger Entry from Printed to Voided.
- Financially Voided: This refers to payments that were initially posted and then voided. Unlike Voided entries above, this type affects the general ledger and creates a reversal entry.
- Exported: Refers to Electronic Payments that have been exported from the Payment Journal but not posted yet.
How to View and Reexport Historical Positive Pay Entries
In the Bank Account Card, you can find exported Positive Pay Entries under Related > Bank Acc. > Positive Pay Entries. You can also personalize your profile to make it easier to find. From this page you’ll see all previously exported files with the following high-level information. Note that the columns mention Check a few times, but these include both Checks and Electronic Payments.

- Reexport Positive Pay to File: Use this button to re generate the file.
- Upload Date and Time: When the file was originally exported.
- Last Upload Date and Time: The last time it was exported.
- Number of Uploads: Total number of payment and voided records in the file.
- Number of Checks and Voids: Count of each transaction type. Although this states “Checks,” it does include Electronic Payments.
- Check and Void Amount: Total amount per type.
- Confirmation Number: An optional field for tracking.
- Positive Pay Entry Details: Click this button in the ribbon to view the detailed entries for a selected file.
Thank you for reading, I hope you learned something new.
As always, stay SAASY my friend.
-Dino

Leave a comment