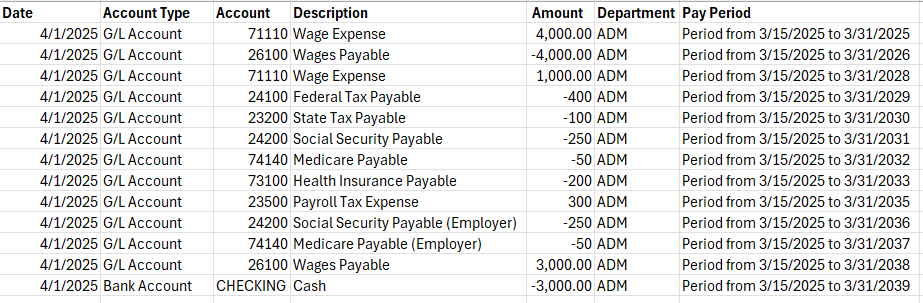
Below is an image of a sample file as well as the two tasks to complete.
- Create a Data Exchange Definition: This maps the import file fields to Business Central fields.
- Update the General Ledger Setup
Data Exchange Setup
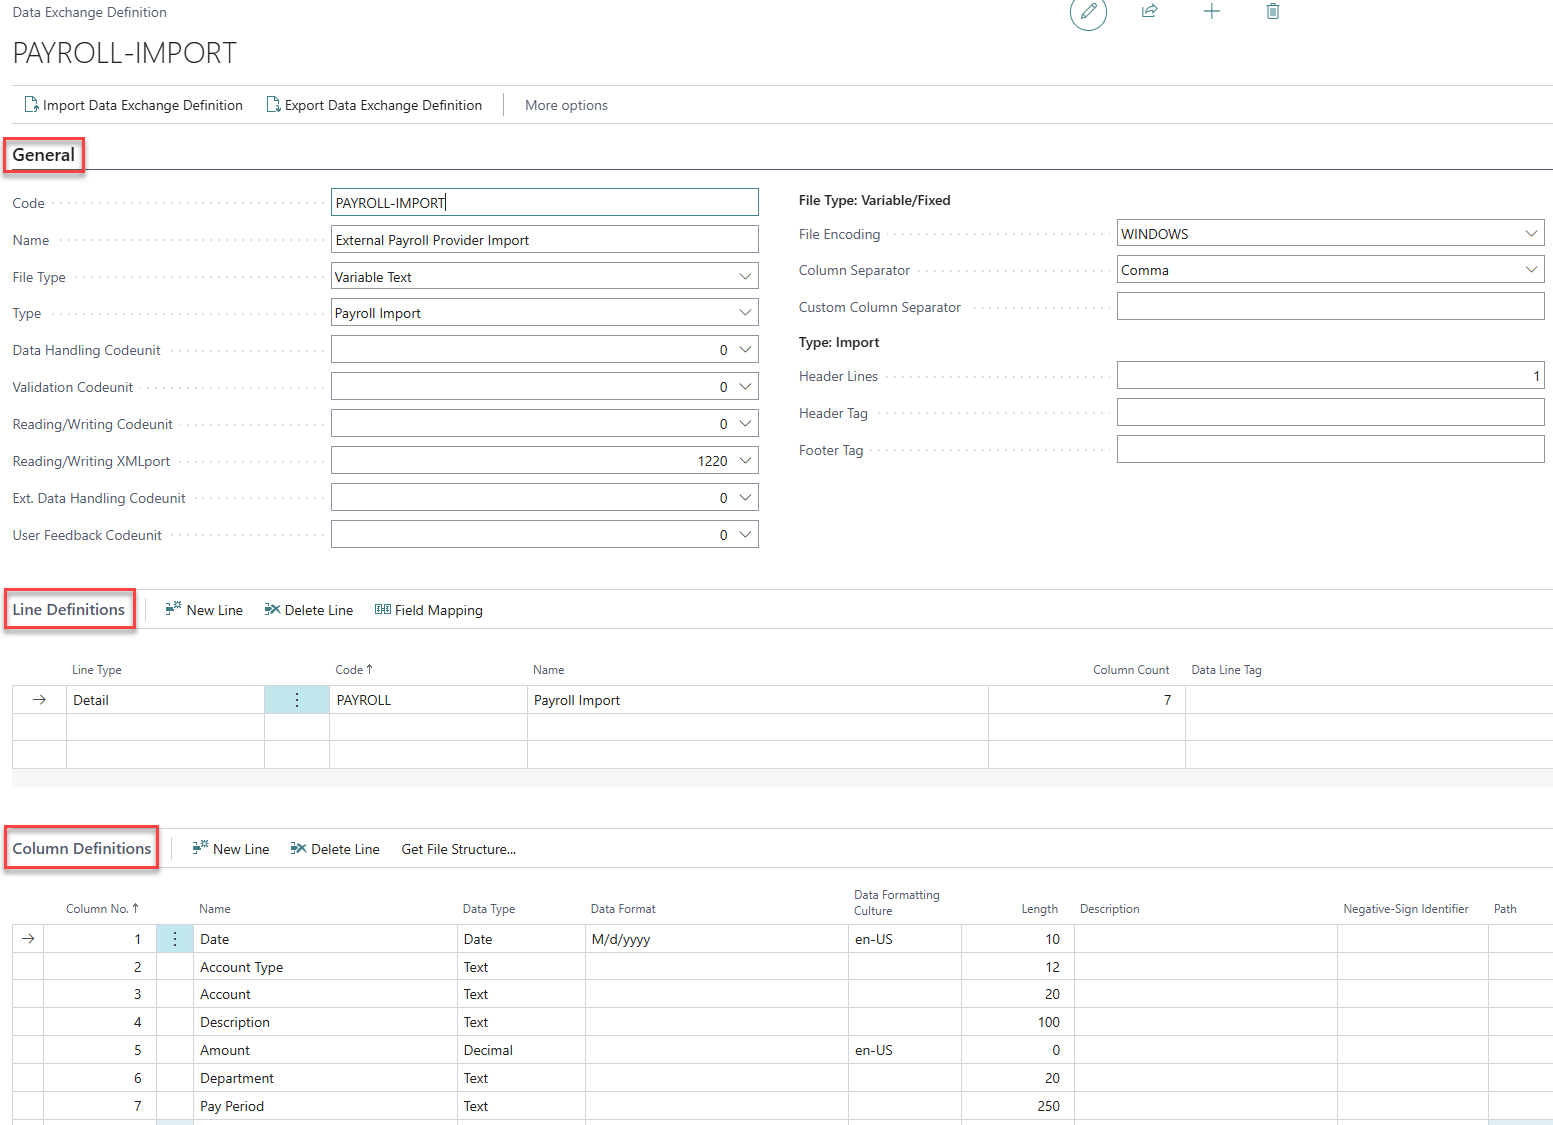
General Section
- Code and Name: Whatever you want, I don’t care 😉
- File Type: Variable Text
- Type: Payroll Import
- Reading/Writing XMLport: 1220
- File Encoding: Windows
- Column Separator: Comma
- Header Lines: (If applicable): 1
Line Definitions
- Line Type: Detail
- Code and Name: Literally anything…
- Column Count: Number of columns your file contains
Column Definitions
Here you add the columns you wish to import into Business Central. Mapping all columns is not required; only select the relevant ones.
- Column No.: The position number of the column in the file.
- Name: Column name from file
- Data Type: Choose the appropriate type
- Data Format: For Dates you want to use M/d/yyyy
- Data Formatting Culture: en-US for US formatting of dates and decimals
- Length: Set a character limit for the incoming value, ensuring it does not exceed the field limit in Business Central. If unsure, you can inspect the General Journal page to verify field lengths.
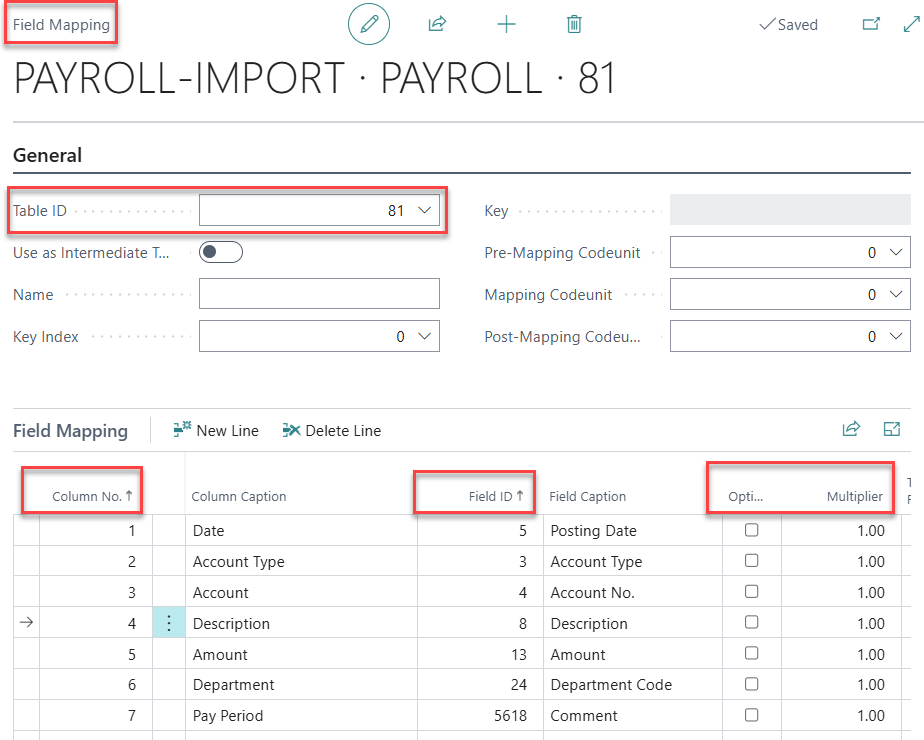
Field Mapping
After completing the above sections, you need to map the Column Definitions to the related fields in Business Central.

- Select the Field Mapping button in the Line Definitions section.
- Table ID: 81
- Use the dropdown in the Column No. field to select a column from the file. Then, in the Field ID, map it to the corresponding Business Central field.
- Optional: Select this for columns that may not always require a value, like Description for example. If not selected, the import will error if the value is empty.
- Multiplier: Useful for situations where Debit and Credit columns are separated, but both show positive numbers. You can add a -1 to the Credit column to reverse the sign. In that situation, both columns would be mapped to the same Field ID for Amount.
General Ledger Setup

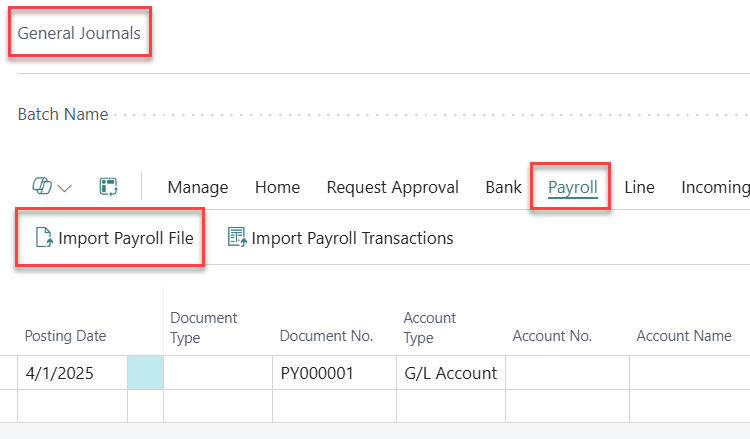
Importing the Payroll File
Now you’re ready to use the import, let’s see this in action! 😊To upload the file, go to the Payroll tab in the General Journal and select the Import Payroll File button.
Note: The Payroll Trans. Import Format in the General Ledger Setup and the Import File button on the General Journal page might be hidden by default. If so, you must add them to the pages through personalization. Additionally, in my example the Document No. is prefilled from Business Central and not the import file through a setup I did for this specific batch.
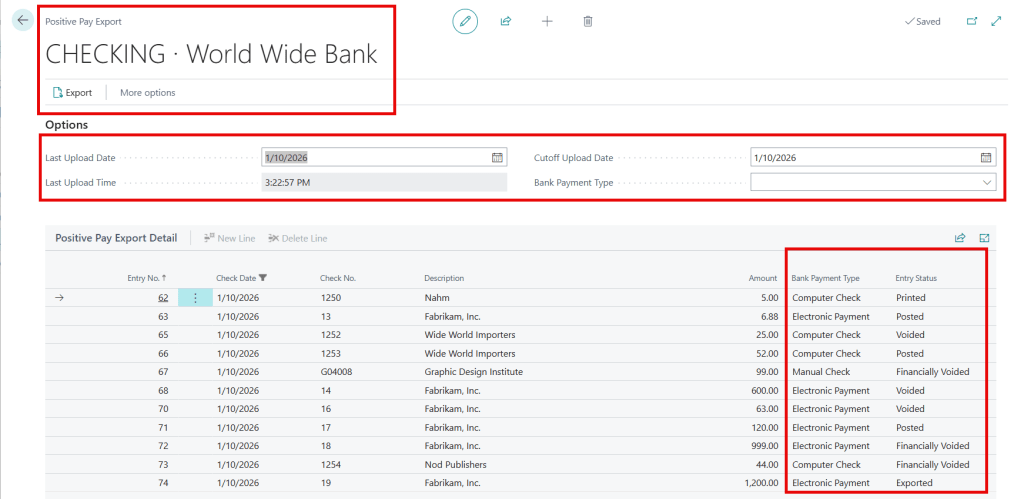
Last Note 😊: Data Exchange Definitions are also used for importing bank statements and exporting positive pay files.
Thank you for reading, I hope you learned something new.
As always, stay SAASY my friend.
-Dino

Leave a comment