In this article, we’ll learn how to import a CSV file for bank reconciliations in Microsoft Business Central. We’ll cover two types of files: 1. A simple file with a few columns, and 2. A file where all amounts are positive, with a column indicating whether they are credit or debit.
Four Key Steps to Set Up a Bank Reconciliation Import
- Obtain Bank File Format: File structures vary by bank, so yours may differ from the example shown. Export a CSV from your bank or contact them for assistance.
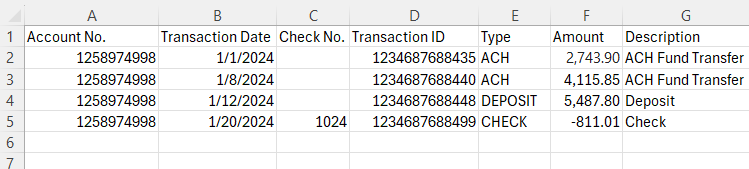
- Create a Data Exchange Definition: The image below shows the sample file to be imported. The Data Exchange Definition is where you map the fields from the import file to the corresponding fields in Business Central.
- Bank Import/ Export Setup: Create a new code and link it to the data exchange definition.
- Update the Bank Account Card
Data Exchange Setup
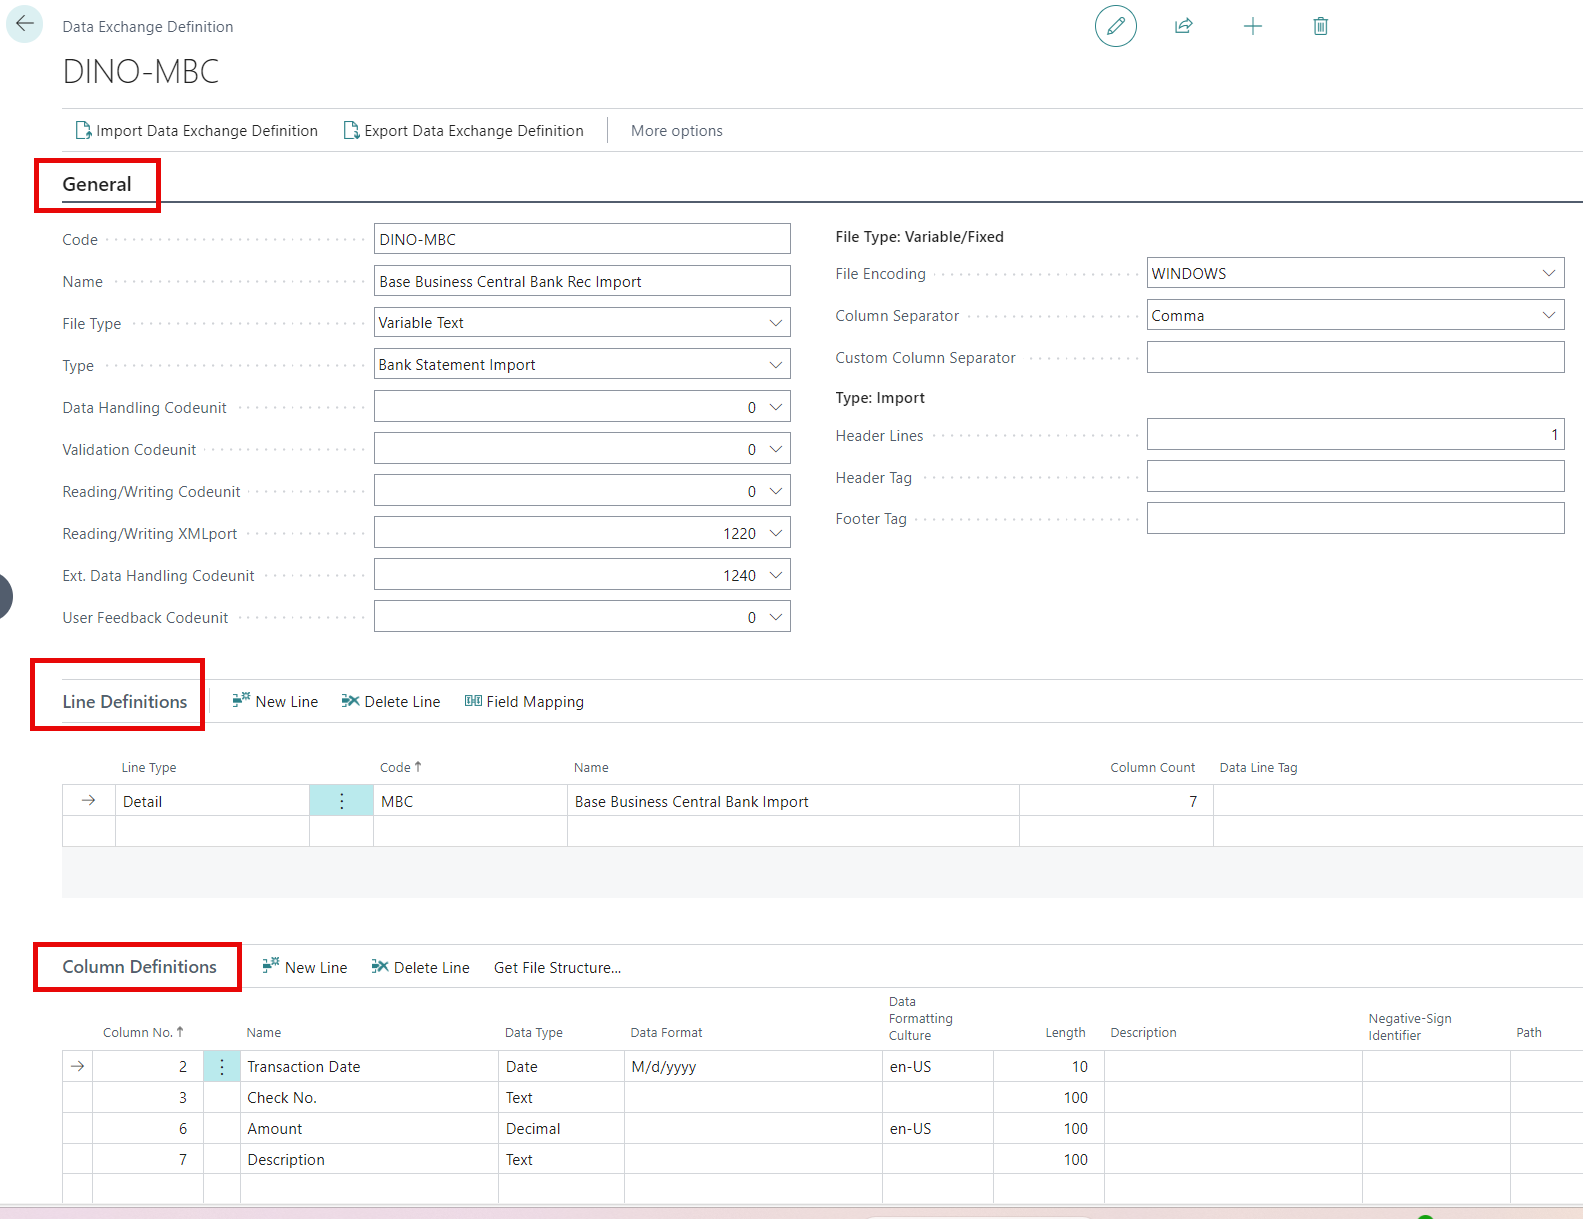
General Section
- Code and Name: Whatever your heart desires..
- File Type: Variable Text
- Type: Bank Statement Import
- Reading/ Writing XMLport: 1220
- Ext. Data Handling Codeunit: 1240
- File Encoding: Windows
- Column Separator: Comma
- Header Lines: 1
Line Definitions
- Line Type: Detail
- Code and Name: Up to you…
- Column Count: Number of columns your file contains
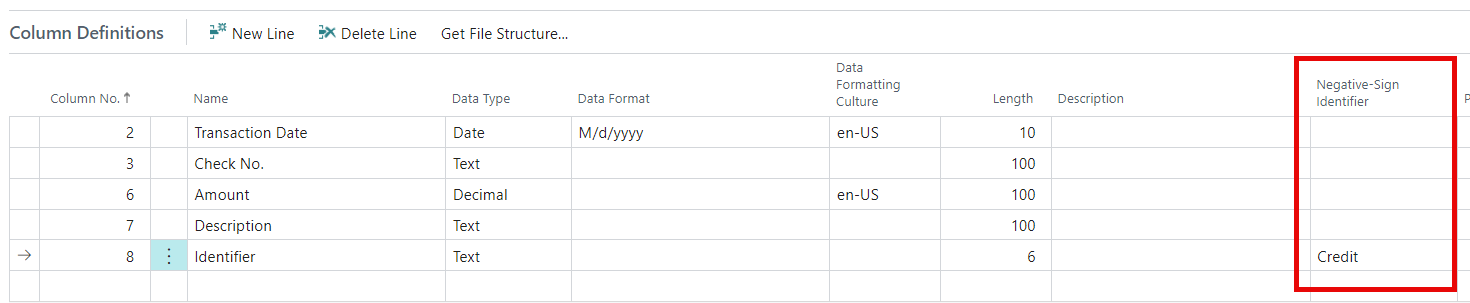
Column Definitions
Here you add the columns you wish to import into Business Central. Mapping all columns is not required; only select the relevant ones.
- Column No.: The position number of the column in the file.
- Name: Column name from file
- Data Type: Choose the appropriate type
- Data Format: For Dates you want to use M/d/yyyy
- Data Formatting Culture: en-US for US formatting of dates and decimals
- Length: Set a character limit for the incoming value, ensuring it does not exceed the field limit in Business Central.
- Negative-Sign Identifier: Enter the value in the data file that indicates negative amounts. This identifier converts those amounts to negative values during import.
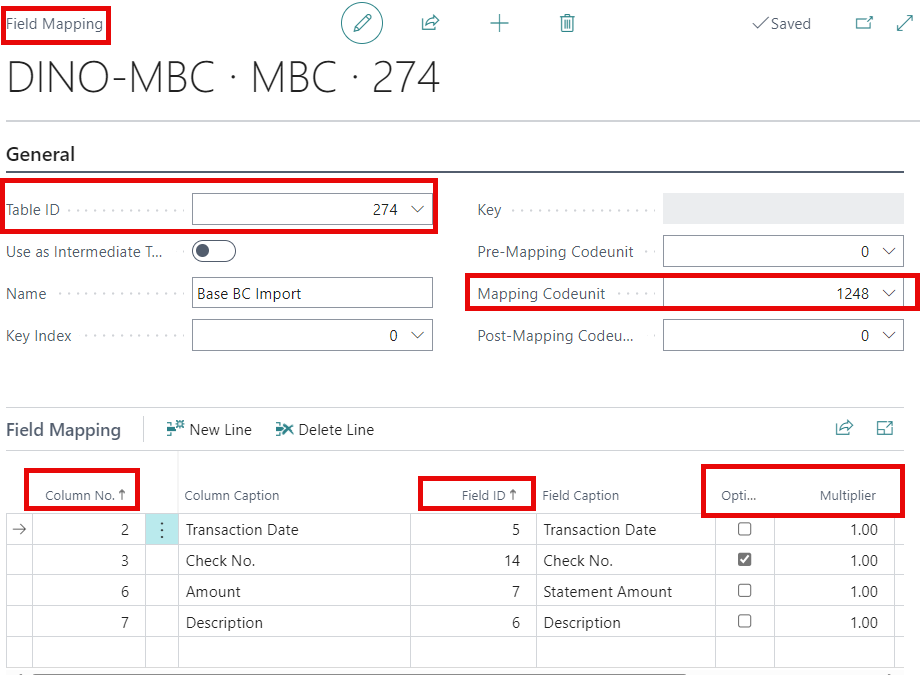
Field Mapping
After completing the above sections, you need to map the Column Definitions to the related fields in Business Central.

- Select the Field Mapping button in the Line Definitions section.
- Table ID: 274
- Mapping Codeunit: 1248
- Use the dropdown in the Column No. field to select a column from the file. Then, in the Field ID, map it to the corresponding Business Central field.
- Optional: Select this for columns that may not always require a value, like checks. If not selected, the import will error if the value is empty. If your Debit and Credits are in different columns both will need this checked off.
- Multiplier: Useful for situations where Debit and Credit columns are separate, but both show positive numbers. You can add a -1 to the Credit column to reverse the sign.
Bank Export/ Import Setup

- Code and Name: Your choice
- Direction: Import
- Processing Codeunit ID: 1270
- Data Exch. Def. Code: Select the data exchange we previously created
Final Step: Add to Bank Account Card
To finish, open the Bank Account Card and add our new code in the Bank Statement Import Format found in the Transfer section.

Now you’re ready to use the import, let’s see this in action! 😊
Negative Sign Identifier Example
Now, let’s look at using the Negative-Sign Identifier for files with only positive numbers and a column indicating debit or credit. We’ll use the example file below. There are two slight changes we need to make from the configuration we did already.
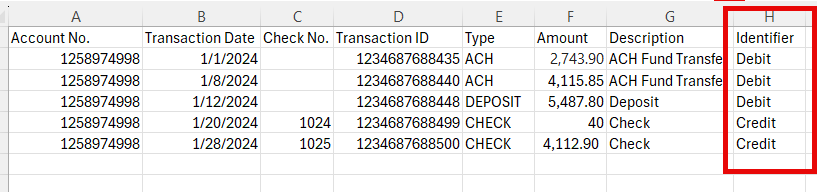
- Column Definition Change: Add a column for the negative indicator and enter the credit code in the Negative-Sign Identifier field.
2. Field Mapping Change: In the Field Mapping you need to map this identifier field to the Statement Amount. ANNDDDDDD that’s it!! Now on imports the amounts will change to credits when the Negative-Sign Identifier is found.

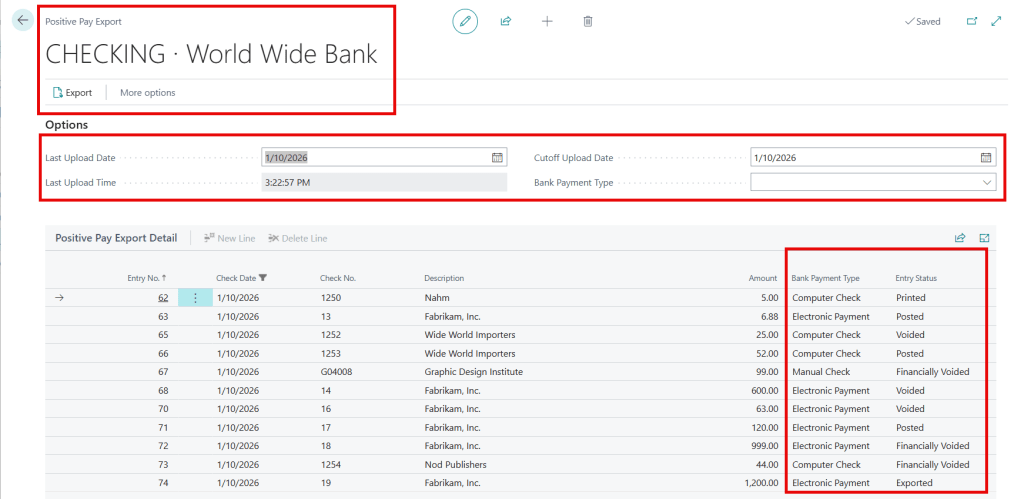
Last Note 😊: Data Exchange Definitions are also used for importing payroll files and exporting positive pay files. Click the links to review how they are setup.
Thank you for reading, I hope you learned something new.
As always, stay SAASY my friend.
-Dino

Leave a comment